You may need to understand basic concepts such as virtualization and navigation before you can understand this guide.
¶ Stopping the Guardian
In this guide, we will be teaching you how to free a lyokowarrior from a Guardian.
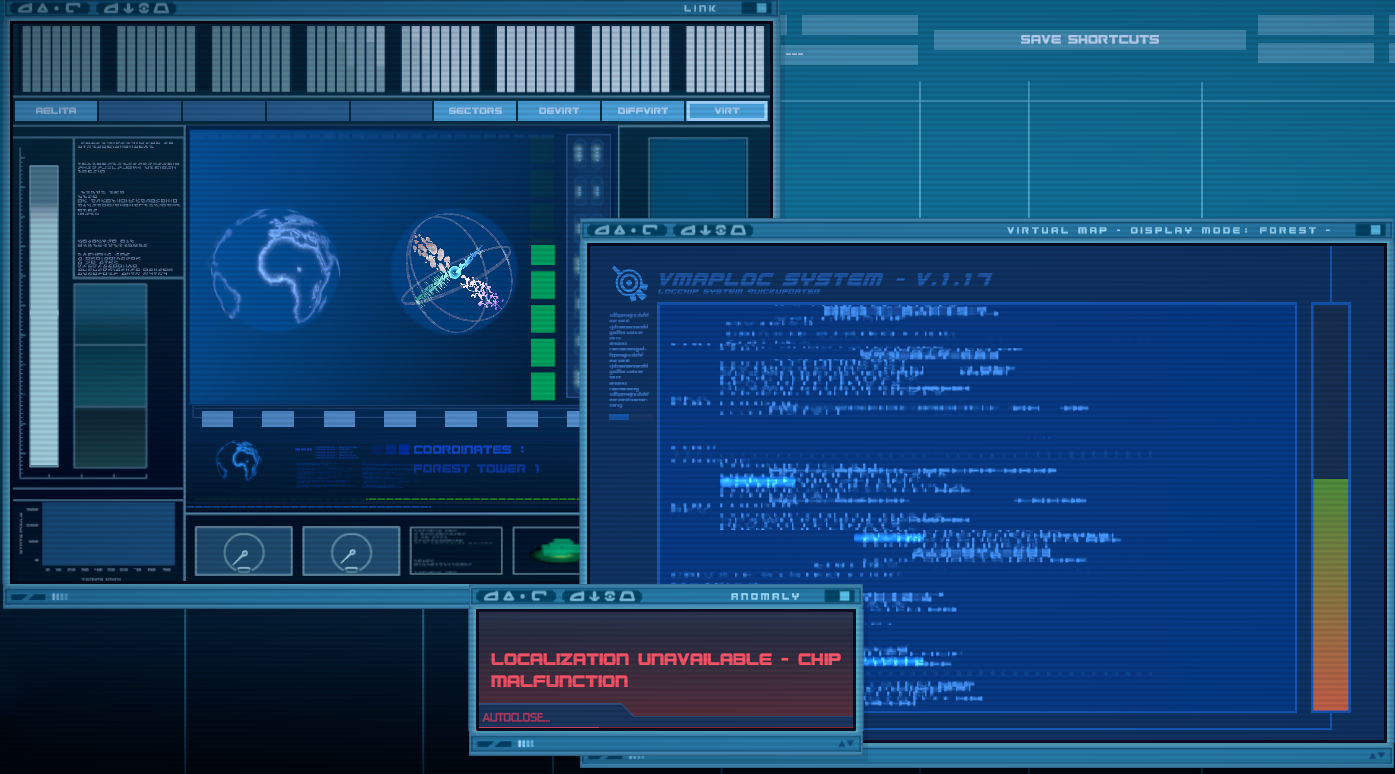
The Guardian is a special enemy made by XANA that traps lyokowarriors inside itself while also stopping your ability to locate it. (And it will usually move through sectors when it does this!)
Through these steps, you will understand how to fix this process and in turn, defeat the Guardian.
¶ Step 1: Locating the unlocatable
You'll want to get up out of your seat for this one Jeremy. Use a Right-Click to open the Radial Menu.

In the laboratory room, along the disc in the center will be interactions for a ‘Removable plate'. Interacting with them will expose the electronics underneath.
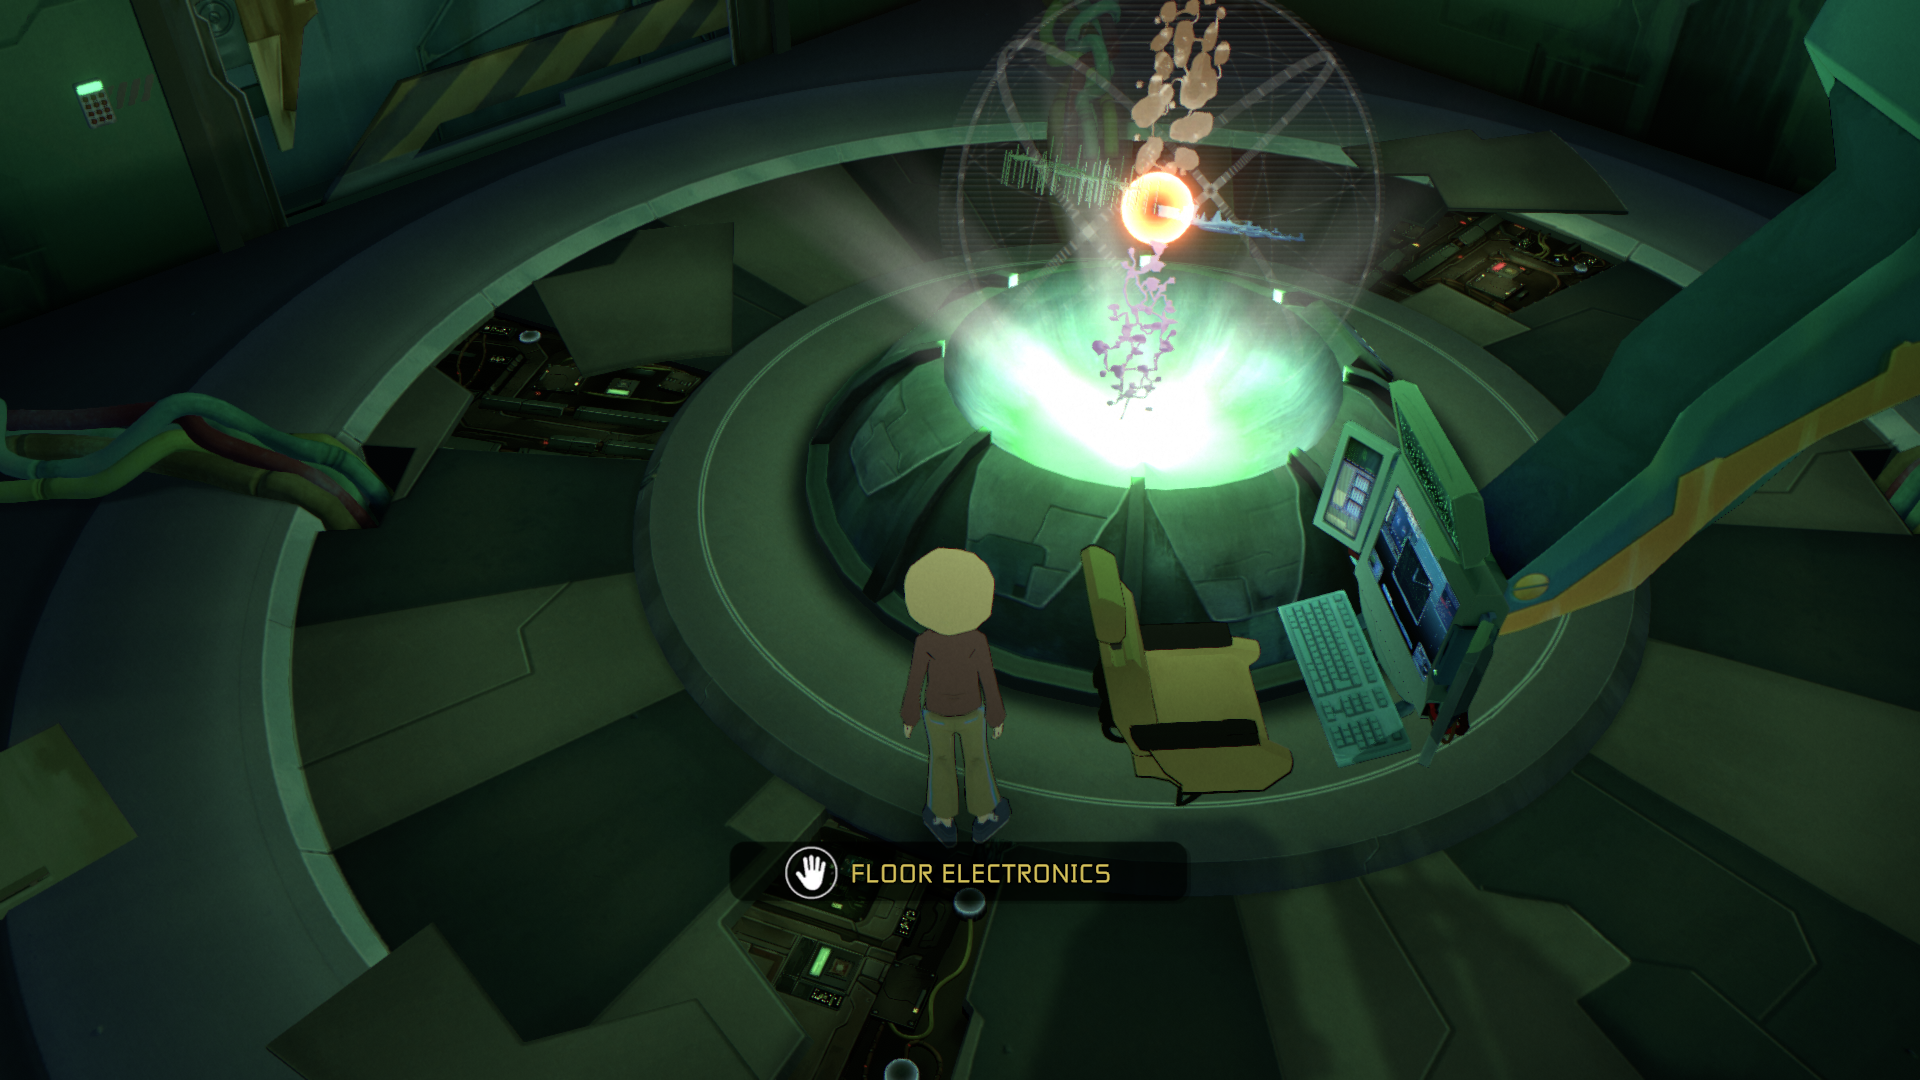
Two of these aren't super important, as only one of them will be “broken” in this example. Which you can see in the top right. (The one with a red light.)
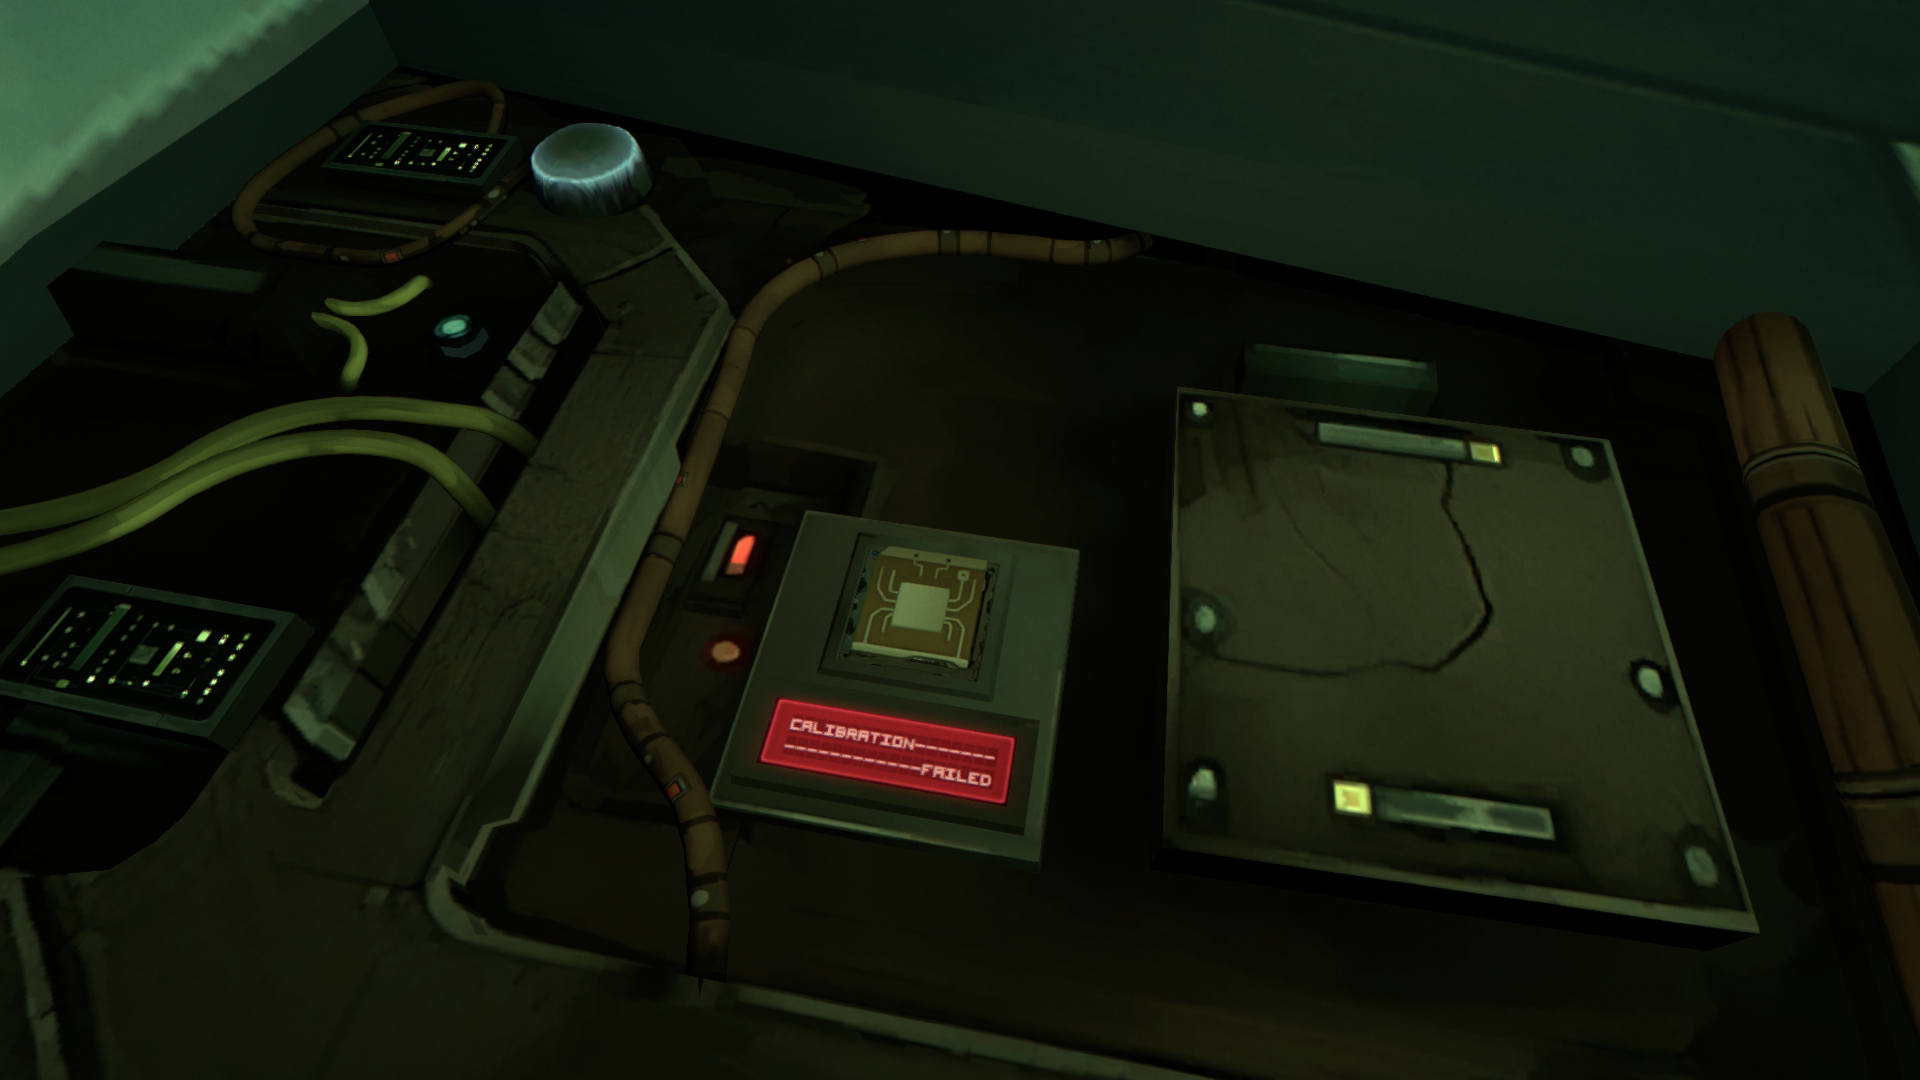
This is what it will look like up close: The ‘Sector Entity Locator’ chip, or S.E.L. for short.
This computer chip is responsible for doing things like finding your lyokowarriors or tracking enemies. (A process called ‘Localization.’)
After finding the damaged chip, take it out and go over to this part of the holomap in the center of the room.
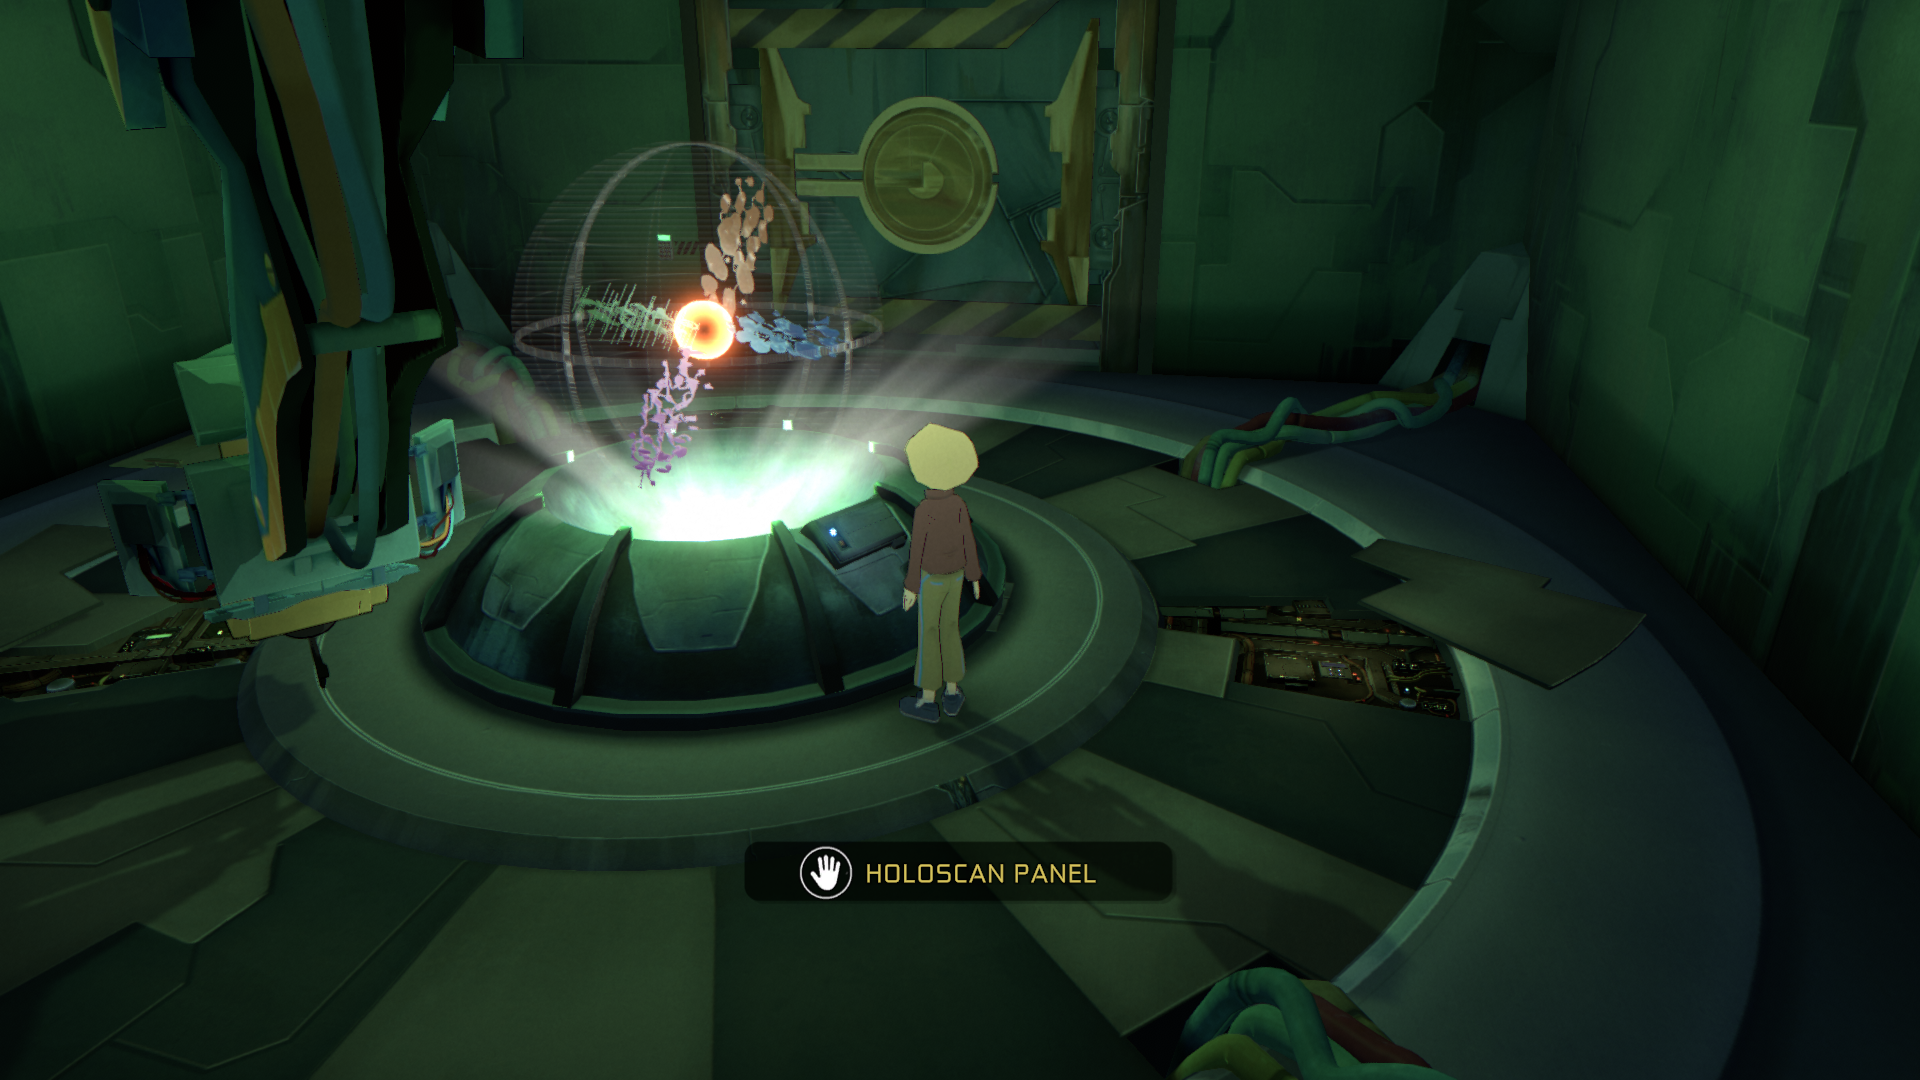
Interact with this box and simply press the button to the left. It should open up the panel where you can insert the chip.
Now on the right side will be a little screen with some meters that move to the right and then reset. What you want to do is press the blue buttons to the left side of that screen when the meters reach a specific point, indicated by a white square. Once you've done that, just press the big yellow button underneath the chip to calibrate it.
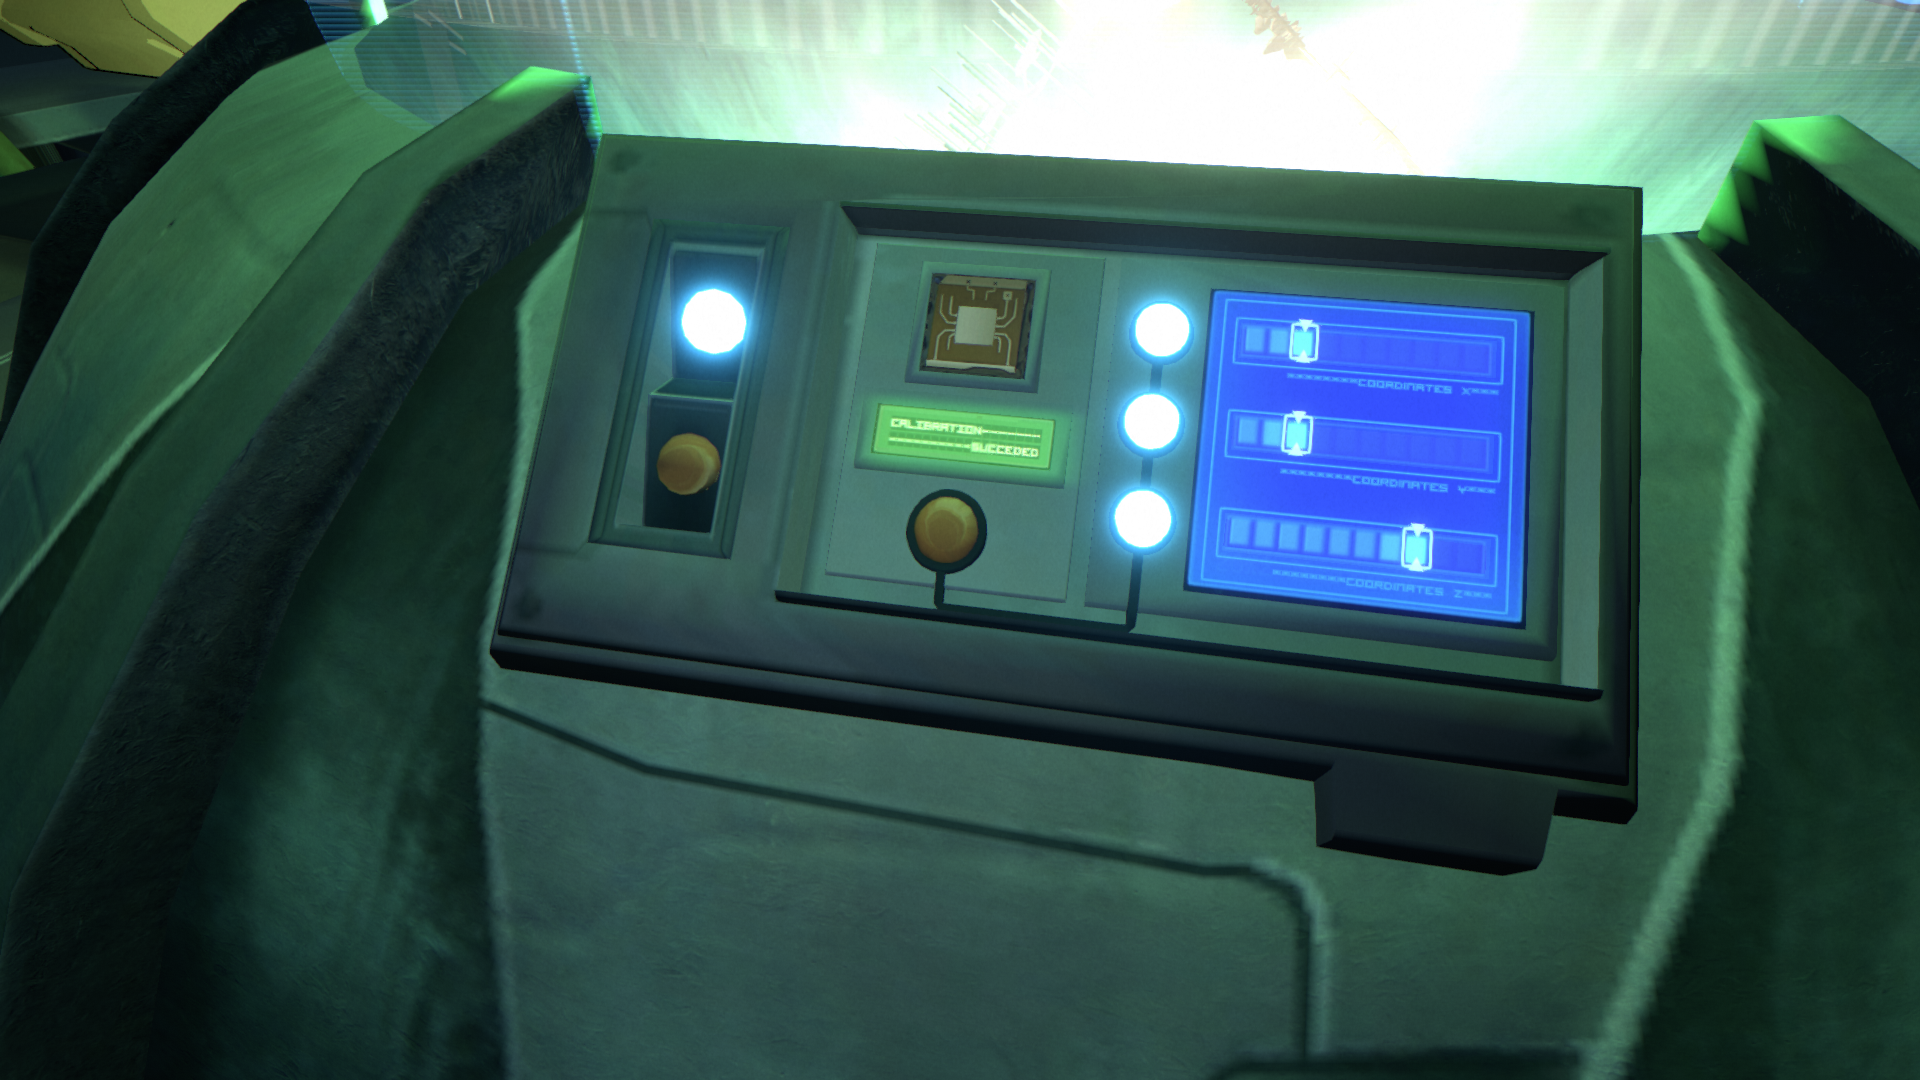
With that done, take the chip out and return it to the electrical panel you found it in. From there, we move onto:
¶ Step 2: Locating the locatable (Dealing with the Guardian)
You may return to your seat now.
What you just did was recalibrate the ‘localization’ sensors, which means you can find the trapped lyokowarrior now with the following command; vmap.LYOKOWARRIOR (Replace “LYOKOWARRIOR” with whoever it was that was trapped. Aelita, Odd, etc..)
In addition to finding the lyokowarrior, a new ‘Guardian Bubble’ window will pop-up with a timer.

You won't be doing much with this window other than monitoring the Surge Timer. If you let this countdown to 0, the guardian will send a pulse of energy that again uncalibrates the SEL chip (And the guardian will move to yet another sector). If that happens, repeat what was taught to you in Step 1.
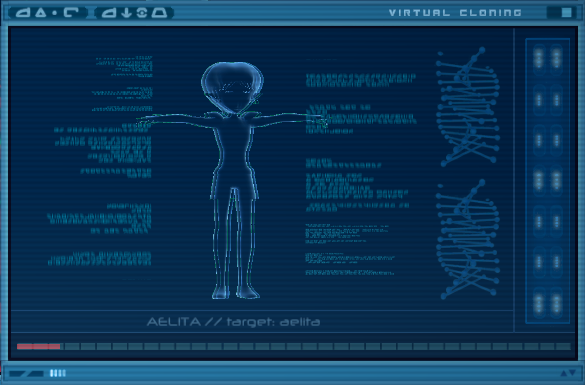
Now defeating the guardian isn't as simple as throwing your other lyokowarriors at it and knocking it down. This will require use of the ‘clone’ program and transfer protocols, which is started with the commands clone and transfptc
With these windows open, the next bits are very simple. So simple you can just use the following commands (adjust them as needed):
transfptc.mode.virtual - Changes transfer protocol to ‘virtual’ (This will prevent you from using the scanners)
clone.LYOKOWARRIOR - Clones the lyokowarrior (Again, replace “LYOKOWARRIOR” with whichever one is trapped)
clone.to.LYOKOWARRIOR - Assigns virtualization of the clone to where the lyokowarrior is
clone.evirt - Emulates virtualization (virtualizes the clone)
transfptc.mode.terrestrial - Changes transfer protocol back to ‘terrestrial’ (allowing you to virtualize and devirtualize lyokowarriors)
¶ Conclusion:
If you did everything correctly, your lyokowarrior should now be free.

Congratulations.
Now do be careful, monsters may show up near the freed lyokowarrior. And being released from the guardian leaves the Lyokowarrior in a bad state, having only 10 HP, making it just about impossible for themselves to fight off whatever appears. Hope you got your gang nearby to help them out. (Or you could devirtualize them yourself.)
¶ Pro-Tip:
If you see a Guardian coming towards one of your Lyokowarriors, you can evirt a clone in and press the big 4-sided arrow button in the process, and the clone will head towards the Guardian. Upon making contact, the Guardian will be destroyed, preventing a Lyokowarrior from being captured in the first place.
You can also use the steps described above (with the exception that you don't need to repair the SEL) for the Scyphozoa.