¶ Combat breakdown
AOE meaning: area of effect - affects more than one target
¶ Basics
A battle occurs when a monster and a LW comes into contact on the vmap. Combat in IFSCL is turn based - first your LWs attack the opposing monsters and after them the monsters (that are still alive) will attack back.
¶ Options

The battle difficulty is determined by the two options above, being game difficulty and battle timer speed. The higher the difficulty is, the harder it becomes to kill monsters and survive their attacks, because the damage you deal and take and also the usage of your AP (Attack Points) vary depending on the game difficulty. The higher your battle timer speed is, the less time you have to make decisions in regards to which move to use and what to attack with it.
Warriors (except Aelita) have an advantage against specific enemies based on their class:
- Ranged - Yumi & Odd deal more damage to flying enemies. These are Hornets, Mantas, Black Mantas and the Scyphozoa.
- Melee - William & Ulrich deal more damage to land enemies. These are Kankrelats, Krabs, Bloks, Tarantulas and Megatanks.
In this guide the cost of actions are shown at expert difficulty!
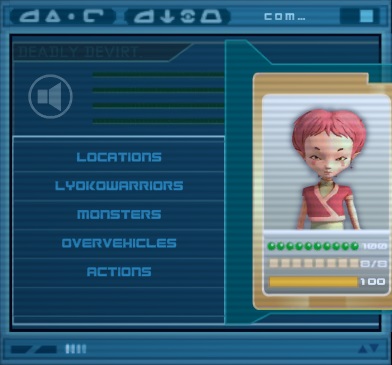
¶ Comcard breakdown

- HP - It's the first row with the green spheres. If you lose all HP, your warrior gets devirtualized. Depending on how “tired” they were before virtualizing, they enter their “tired” or “exhausted state”. HP gradually recharges when staying in towers.
- AP - It's the second row with the squares. It's used to perform special battle actions such as “charged attacks” (they end with X in their name), multiple enemy targeting attacks, unique moves, etc…. We're going to be breaking down every move one by one later. AP cannot be recharged, except for Odd once only per virtualization while on Lyoko by clicking on
“Actions” → “Reload AP” on his comcard while not in combat.
- Superspeed - It's the yellow bar on the card. It's used outside of combat for movement. While it's not empty the LW will move slightly faster.
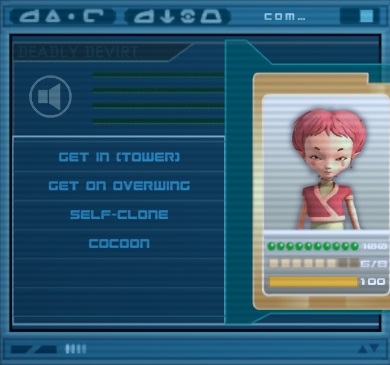
¶ Special actions outside of combat
At the moment only two of these actions exist. These are:
- As mentioned earlier, Odd can recharge his AP while not in combat once only per virtualization.
- If Aelita has atleast 6AP she can create a physical cocoon on the map where all the LWs can hide. While it's up, monsters might attack it to get the LWs out from the shelter. It doesn't work against the Scyphozoa and the Guardian, they can still grab a LW from it. To make a cocoon, click on “Actions” on Aelita's comcard while she's not in combat and not in a tower. To make others get in, click on “Locations” and the “cocoon” option will take them to it. To enter it, just click on “Actions” → “get in (cocoon)”. To leave, just click on “get out (cocoon)”.
¶ Land Combat
¶ Attacks/actions explained
Every warrior shares 5 actions in combat. These are the following:
- Basic attack - It's the first action that costs 0 AP and does normal damage on a single enemy.
- Charged/"X" attack - It has the same name as a warrior's basic attack, but has an “X” after it. It costs 2AP and deals higher damage to a single enemy.
- AOE attack - It's the third action that costs 4 AP. Can only be used when not more than one ally can attack. It does normal damage, but you can select up to 3 enemies to be hit by it.
- Sacrifice - It's the second to last action that costs 3 AP. The LW gets devirtualized, but it gives a teammate an additional attack in the same turn.
- Flee/Flee intermediate - It's the last action and is for emergencies. The LW needs atleast 1 AP to be able to do it. If your LW has deadly devirt because of a DNA error and they are the only LW in the sector, they can attempt to flee from the battle and get battle immunity for a few seconds, but this will drain all their AP. However, fleeing is not guaranteed and can fail, and when it does, the warrior loses 1AP and they don't get to attack that turn. Aelita on the other hand has regular flee that can be used even if she doesn't have deadly devirt when alone in a sector.
The last action is unique to every warrior but all of them costs 2 AP:
- Ulrich: Triangulate - Paralyzes an enemy for 2 turns making them unable to attack.
- Yumi: Team Effort - Gives back 2 AP to all fighting LWs, making it a good support move.
- Aelita: Defensive Creativity - Gives 10HP back to Aelita and makes her immune to every damage the monsters would inflict to her.
- Odd: Shield - Gives Odd a layer of shield that reflects back half of the damage he would have received onto the monster. However the shield isn't an infinite immunity like Aelita's Creativity and it can break.
- William: Blindness - Can only be used when not more than one ally can attack. It does low damage on at most 3 enemies and reduce their AP by 2 (AP damage only applies to Polymorphic clones)
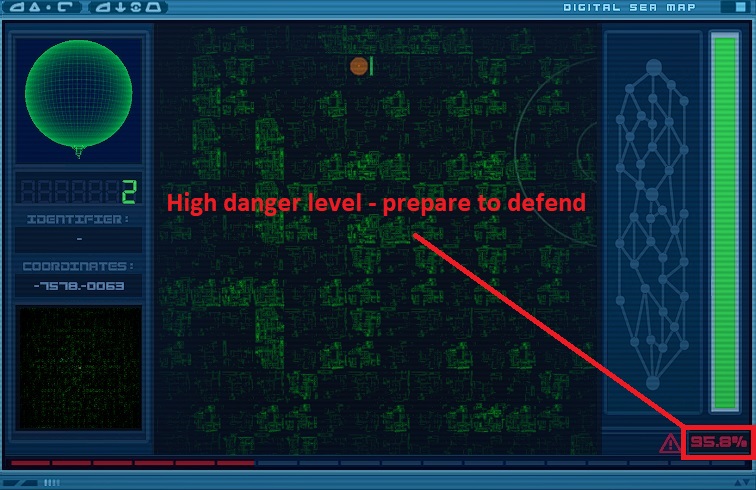
¶ Sea combat
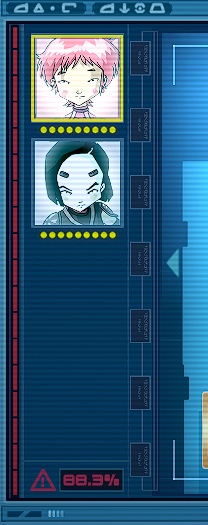
Sea combat takes place in the digital sea while travelling with the skid. It revolves around the same turn based combat, but it has unique monsters and the LWs are fighting using the Navskids and the Skid. Sea combat occurs when your danger level gets close to 99.99% in the sea. Moving at a higher speed, aligning to objects and hacking into replikas gradually increase your danger level overtime. If you don't have smap open, you know you are in danger when the sea turns red on the vmap.
Unlike regular combat, instead of AP; The Skid and the Navskids use torpedos to battle. Additionally they have a shield meter that protects their HP. If their HP gets too low, they will drift away from the Skid during combat. You need to save them with the Skid while they're near, or if it's too late, use the Supersonar.
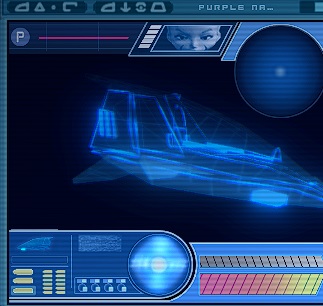
Everytime you engage in a sea combat, on the first turn only the skid will be out.
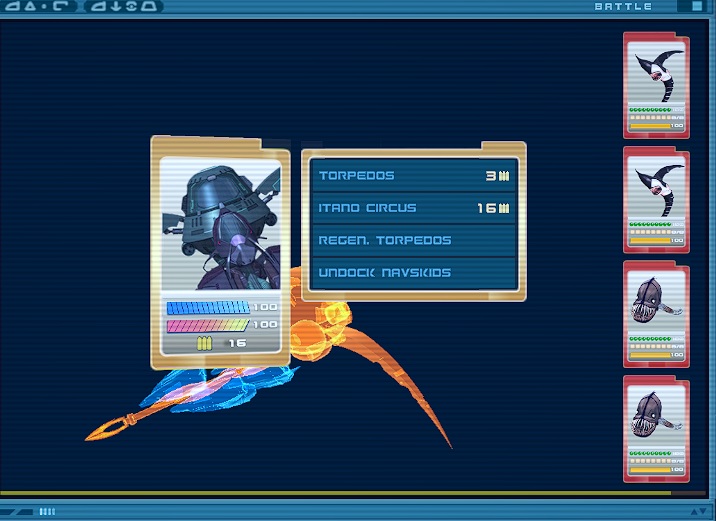
As you can see the skid has 4 options to do:
- Use 3 Torpedos to deal damage to a single enemy
- Use all 16 Torpedos for Itand Circus which deals huge damage but it's targets are completely random (it can hit allies too!!)
- Regen 8 Torpedos (if the “Torpedo” module is damaged, it only regenerates 4)
- Undock all available navskids - aka invite them to the battle. This is what you always want to start out with. (if the “Clamps” module is damaged, undocking the Navskids can fail!)
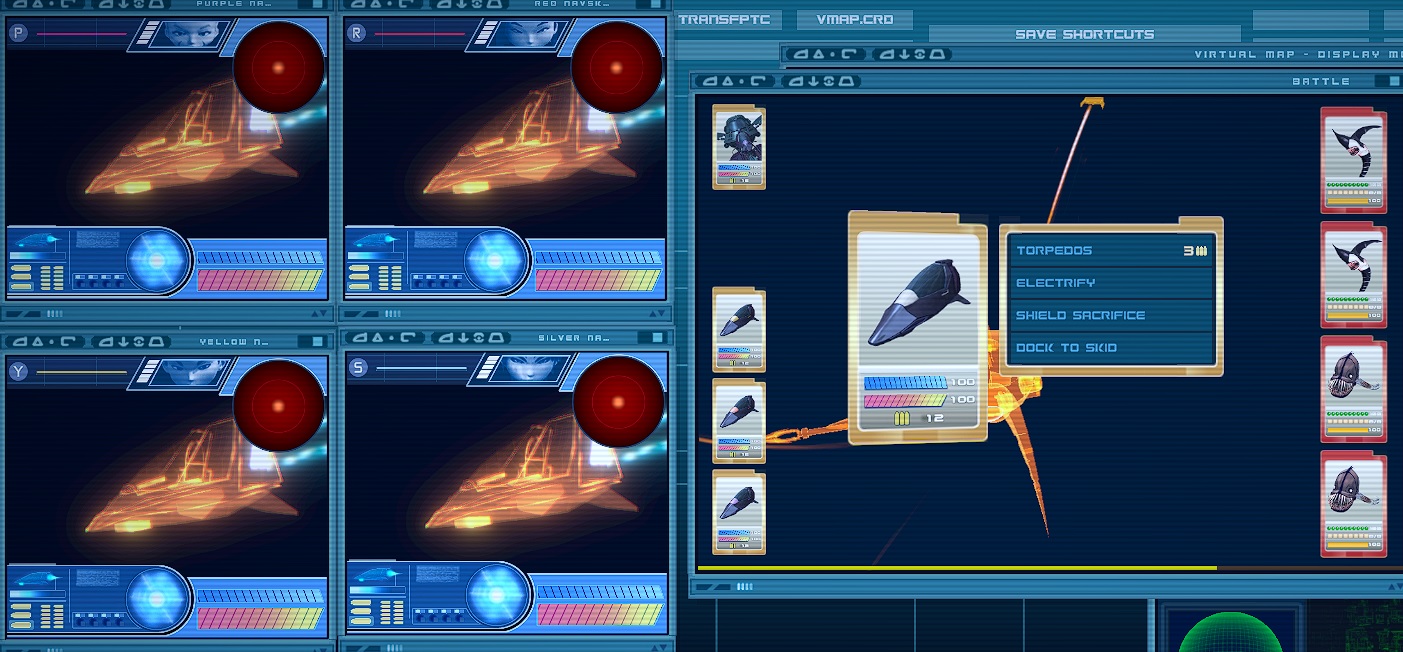
Now it's essentially land combat with a few differences. Namely, the blue bar is the shield of the navskids. It can regenerate when docked to the Skid and it serves as the main protection for the Navskids. The second bar is their HP. If it gets to a critically low level, the Navskids will drift away. On the bottom you can see the number of Torpedos they have left which regenerates when docked to the skid.
All Navskids share these actions:
- Use 3 Torpedos to attack a single enemy
- Electricify - It adds an electric layer to the Navskid for 2 turns. If that Navskid gets hit, it will also damage the attacking enemy. If it was already up for a turn, it only gives 1 extra turn and not 2.
- Shield Sacrifice - It uses up the shield of the Navskid to deal important damage that can even one-shot enemies. Requires atleast 50% of the shield to use.
- Dock to skid - Retreats the Navskid to the Skid, aborting it from combat. It can be released again at any other time.
While any number of Navskids are out the Skid gets 3 new actions that serve as a supporting/defending action:
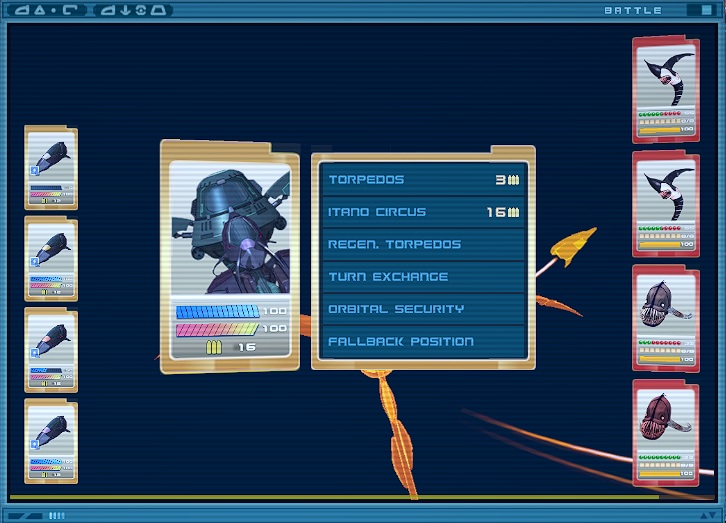
- Turn Exchange - The Skid gives it's turn to an ally.
- Orbital Security - For 3 turns if a Navskid receives critical damage, the skid protects it from drifting away by automatically docking it back.
- Fallback Position - For 3 turns, the Skid gets to a safe position, making it unable to be attacked. Can only be used if the Skid didn't receive damage in that battle.
¶ Replika Combat
The replika combat follows the same turn based system. The biggest difference however is that there's no HP and AP, instead they have TP (Teleportation Points - not official name but we will use this in our guides).
A warrior's replika transition time ends if:
- They lose all their TP
- Their transition time runs out
- If the Skid/Tower activated by you gets destroyed (or in certain cases, taken over by Xana)
Replika movement and combat happens on the rmap instead of the vmap.
Similar to the smap, there's a danger level meter that increases when you teleport someone to the factory, move or interact with doors. If the danger level gets near 99.99% Xana will activate a tower to send in Kankrelats that will make your mission a nightmare.
Each warrior has 3 actions they can do during combat:
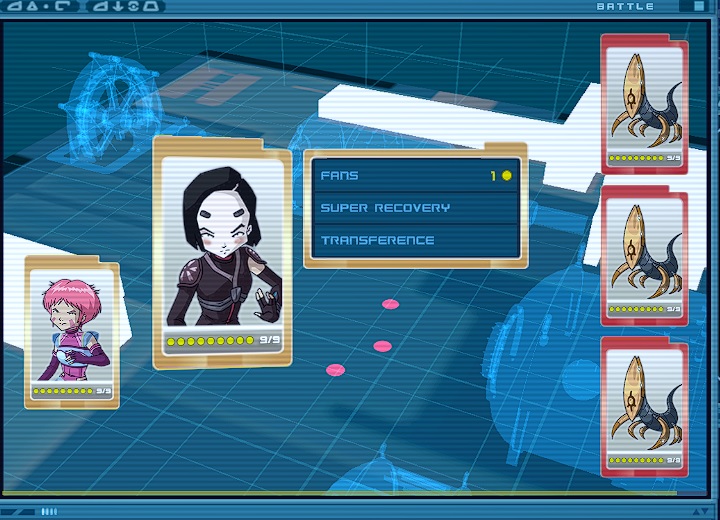
- Normal attack - It uses 1 TP and deals 4TP damage to Kankrelats, 3 TP damage to Cyber Sauriens and 2 TP damage to Giga Sauriens
- Recovery/Super recovery - In exchange for transition time (normal - 2 mins, super - 3 mins) the LW recovers TP (normal - 2 TP, super - 4 TP)
- Unique action - Similar to unique actions in land combat this differs to every warrior:
- Yumi - Transference(free): once per transition, Yumi can switch her TP with an enemy's TP (if Yumi has 1 TP and fights against a healthy monster, this ability will make Yumi be at full health and leave that monster on 1 TP)
- Aelita - Striking wings(3TP): Deals huge damage to up to 3 enemies but removes 3 minutes of transition time from Aelita (deals 7 TP damage to Cyber Sauriens, oneshots Kankrelats, 4 TP to Giga Saurians)
- Ulrich - Fighting grip(2TP): paralyzes one enemy for 2 turns
- Odd - Long burst(2TP): it's an AOE attack with normal strength that can hit up to 3 enemies (deals as much damage as normal attacks)
- William - Charge X(2TP): Deals huge damage to a single enemy (deals 4 TP damage to Giga Sauriens, 7 TP damage to Cyber Sauriens, oneshots Kankrelats)